Configuring Azure Single Sign On (SSO)
In the Microsoft Azure Active Directory side, ensure you have the required members in the appropriate groups that you want to sync in the Qualys Administration application.
- If the user’s First Name and Last Name are not available in Azure AD, they are derived from the available Display Name.
- If the value for Country field is not set in Azure AD, the default value configured for the subscription / Primary Contact (POC) user is used.
- If the value for Title field is not set in Azure AD, the default value is set to Not Applicable (NA).
- If the value for the Address field is not set in Azure AD, the default value is set to Not Applicable (NA).
- If the Preferred Language is set in Microsoft Azure AD, it must be configured to English. If the Preferred Language field is left blank, English is applied by default.
Configuration of Azure SSO
Scenario 1
If you already have the Azure SSO setup in place, perform the following.
Add claim for Qualys external ID
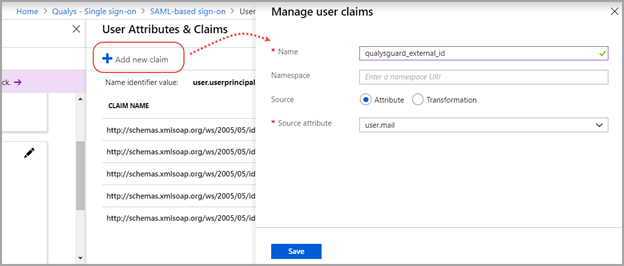
By default, Qualys Enterprise™ Platform is configured to parse the value of qualysguard_external_id that is issued with the SAML token. You must add this claim to the list.
Click Add new claim, and provide the Name as qualysguard_external_id and Source attribute as user.objectid (recommended).
Note: You must leave the Namespace field blank.
You can choose to set the source attribute to another value. If you do, be sure to set the External ID value to match.
Scenario 2
If you do not have any prior Azure SSO setup done at your end, perform the following steps.
Add New Application
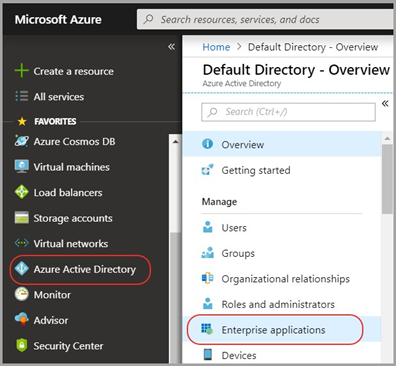
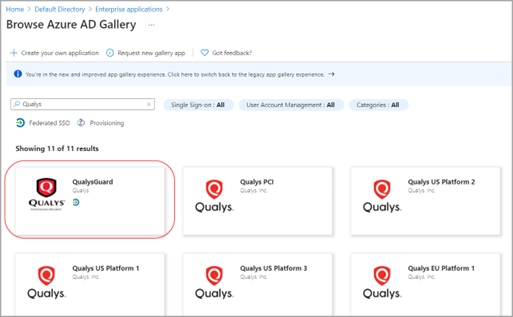
- To add the new application, select Azure Active Directory on the left navigation pane. Then select Enterprise applications.
-
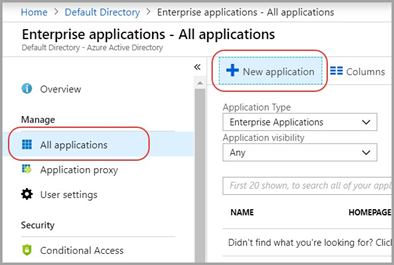
- Perform a search for Qualys among the various Qualys applications available. Select the first application, which has the
 Federated SSO tag. The application appears in the right pane.
- Click Create.
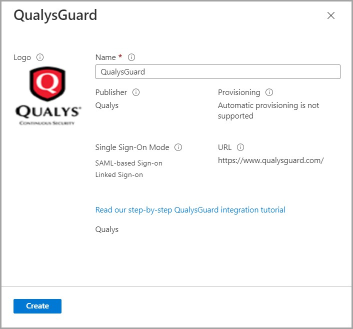
The new application is added and you can now configure it to use SAML single sign-on.
Configure the Application to Use SAML Single Sign-On
From the Qualys application page, select Single sign-on and choose SAML for the sign-on method.
Provide SAML configuration details in these sections:
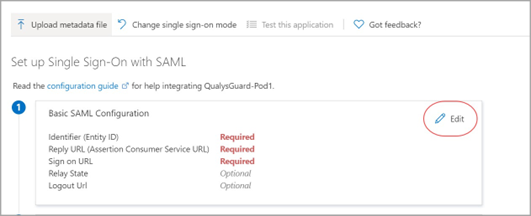
Basic SAML Configuration.
Click the Edit icon to provide required SAML configuration settings.
Identifier and Other Details
Enter the Identifier ID, Reply URL and Sign on URL provided to you by Qualys. Other values are not required. Follow the Patterns shown on the screen for each of the fields.
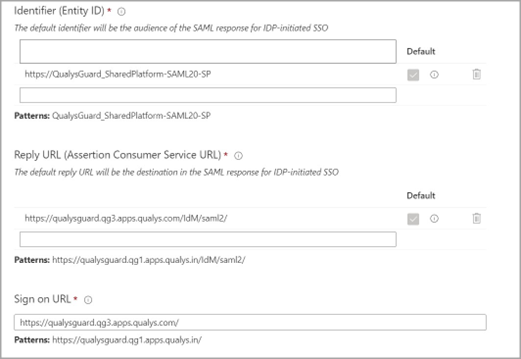
Samples:
Identifier: https://QualysGuard_SharedPlatform-SAML20-SP
Reply URL (based on the Qualys Cloud Platform for your subscription):
https://qualysguard.qualys.com/IdM/saml2/ https://qualysguard.qg2.apps.qualys.com/IdM/saml2/ https://qualysguard.qg3.apps.qualys.com/IdM/saml2/ https://qualysguard.qualys.eu/IdM/saml2/ https://qualysguard.qg2.apps.qualys.eu/IdM/saml2/ https://qualysguard.qg1.apps.qualys.in/IdM/saml2/ https://qualysguard.BASE_URL/IdM/saml2/ (for Private Cloud Platform)
User Attributes & Claims: When a user authenticates to an application through Azure AD using the SAML 2.0 protocol, Azure AD sends a token to the application as a part of SAML Auth Response (via an HTTP POST). And then, the application validates and uses the token to log the user in instead of prompting for a username and password. These SAML tokens contain pieces of information about the user known as "claims".
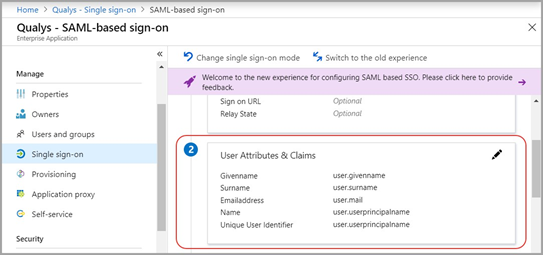
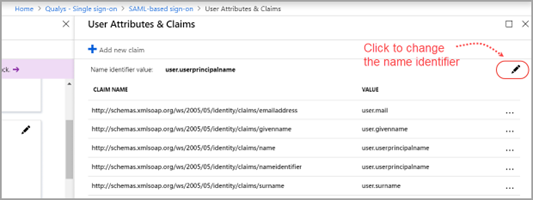
(Optional) Change the name identifier
The Unique User Identifier is mapped to the value of the Azure user’s username (user.userprincipalname). Click the Edit icon to change the name identifier to a different source attribute like user.employeeid.
Add claim for Qualys external ID
By default, Qualys Enterprise™ Platform is configured to parse the value of qualysguard_external_id that is issued with the SAML token. You must add this claim to the list.
Click Add new claim, and provide the Name as qualysguard_external_id and Source attribute as user.objectid (recommended).
Note: You must leave the Namespace field blank.
You can choose to set the source attribute to another value. If you do, be sure to set the External ID value to match.
SAML Signing Certificate
Click Download next to Federation Metadata XML to save the metadata file to your computer. Send this file to Qualys.
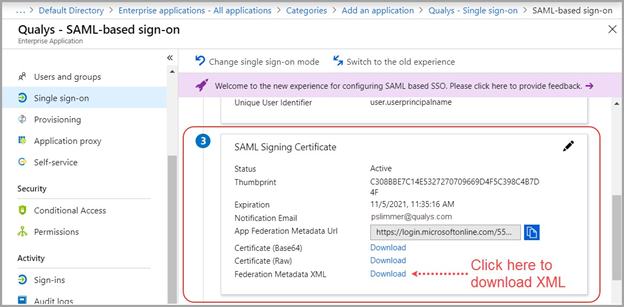
The Federation Metadata XML file is used by Qualys to create the IDP and IDM profile for your subscription. It contains useful information like IDP Entity ID, SSO Re-Direct URL and the Base64 encoded Token Signing certificate.
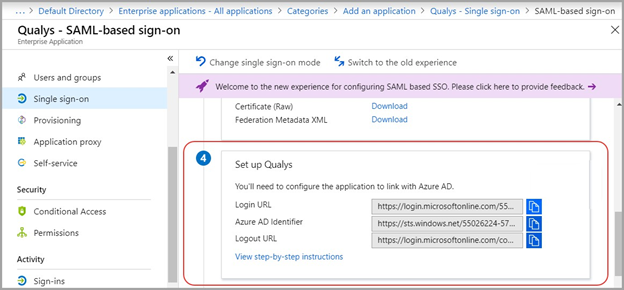
Set up Qualys
The Federation Metadata XML file downloaded in the previous step has the information that Qualys needs. You can skip this step unless you want to customize the logout URL.
By default, the logout URL is set to https://www.qualys.com. You can add a custom logout URL to section 2 of the SAML 2.0 Integration Request Form.
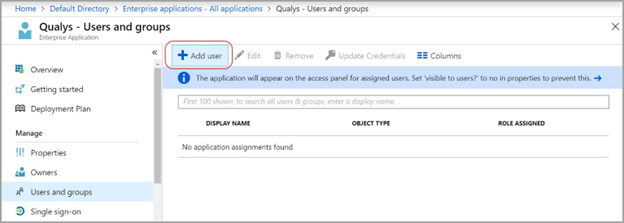
Assign the Azure AD User to Qualys Application
You’ll need to assign users or groups to the application. Azure AD will not allow a user to sign into the Qualys application unless Azure AD has granted access to the user.
Pick the Qualys application from your list of applications. Then select Users and groups.

Click the Add user.
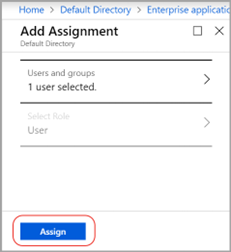
Under Add Assignment, select Users and groups. Click on one or more users in the list to select them, then click the Select.
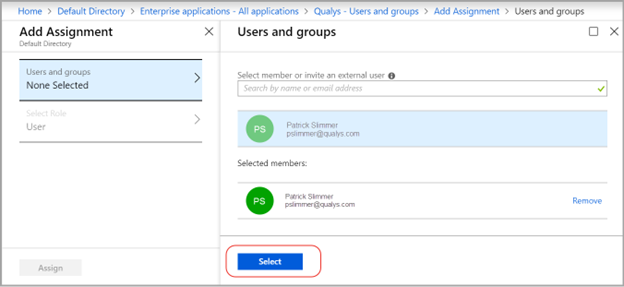
Finally, click Assign. The selected user is now assigned the Qualys application.