Qualys Administration Configuration
The configuration in the Administration application involves the following:
- Creating User Group: You can create a user group, define the scope and assign roles an permissions required to the members of the group. You can also set other options such as Security settings and notifications.
- Managing User Group: You can view details, edit and delete a user group.
Only Super Administrators and User Administrators with the required permissions can manage User Groups. The required permissions include creating and managing the user groups.
In the Administration application, you must create the appropriate user groups that are mapped with the IdP group in the Connector.
Once the Azure AD sync runs successfully, the users included in the IdP group are synced to the Qualys User Group that is mapped in the connector.
Create a User Group
Complete the following steps to create a user group:
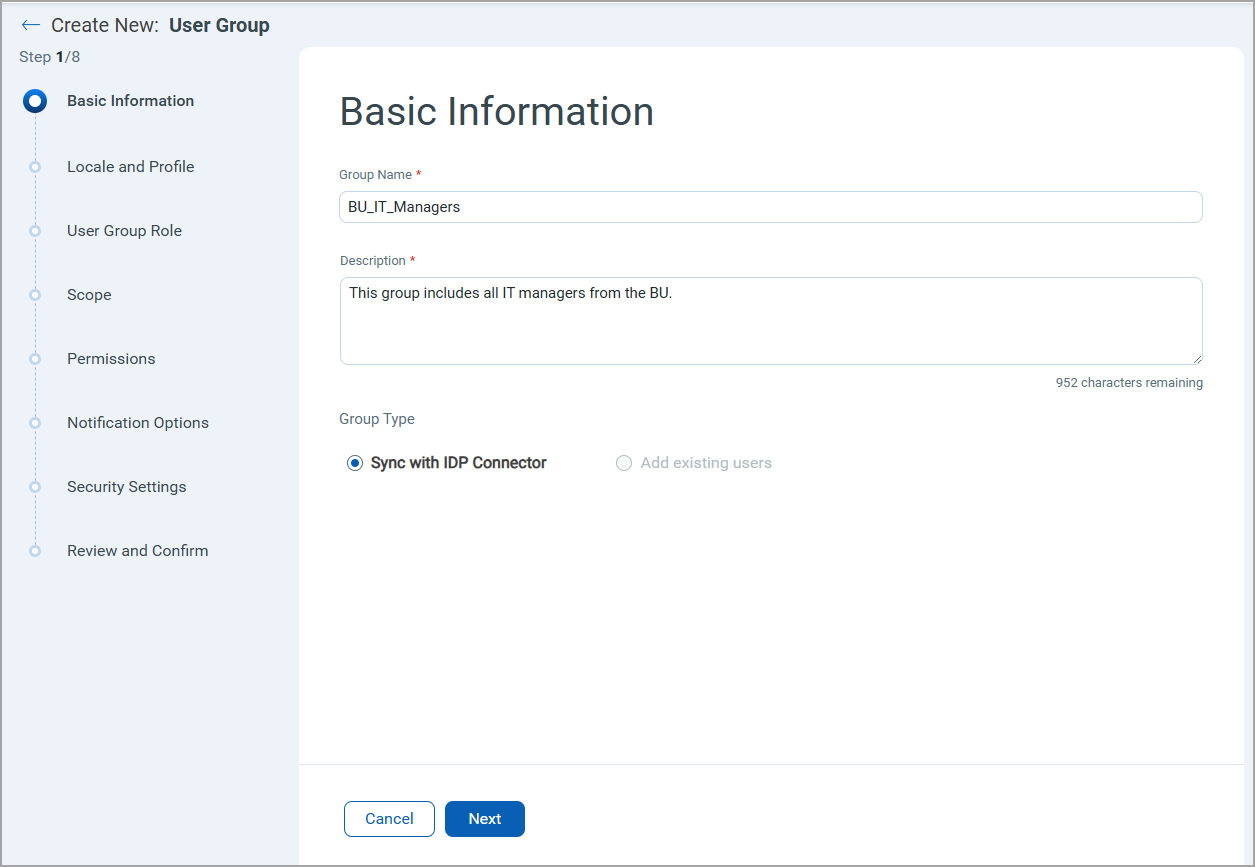
Basic Information
Enter a group name and description. Under the Group Type section, the Sync with IdP Connector option is selected by default. Click Next.
Locale and Profile
Refer to the following details and select the appropriate options:
- Select the Language and Date Format. By default, English language and Global Format are pre-selected.
- Under Timezone section, Use browser time zone option is selected by default.
- (Optional) To use custom time zone, select the Use custom time zone option. In the Select custom timezone field, select the required time zone.
- Click Next.
User Group Role
Refer to the following details and select the appropriate options:
- In the User Group Role drop-down field, select the role to be assigned to the members in the group.
Note:
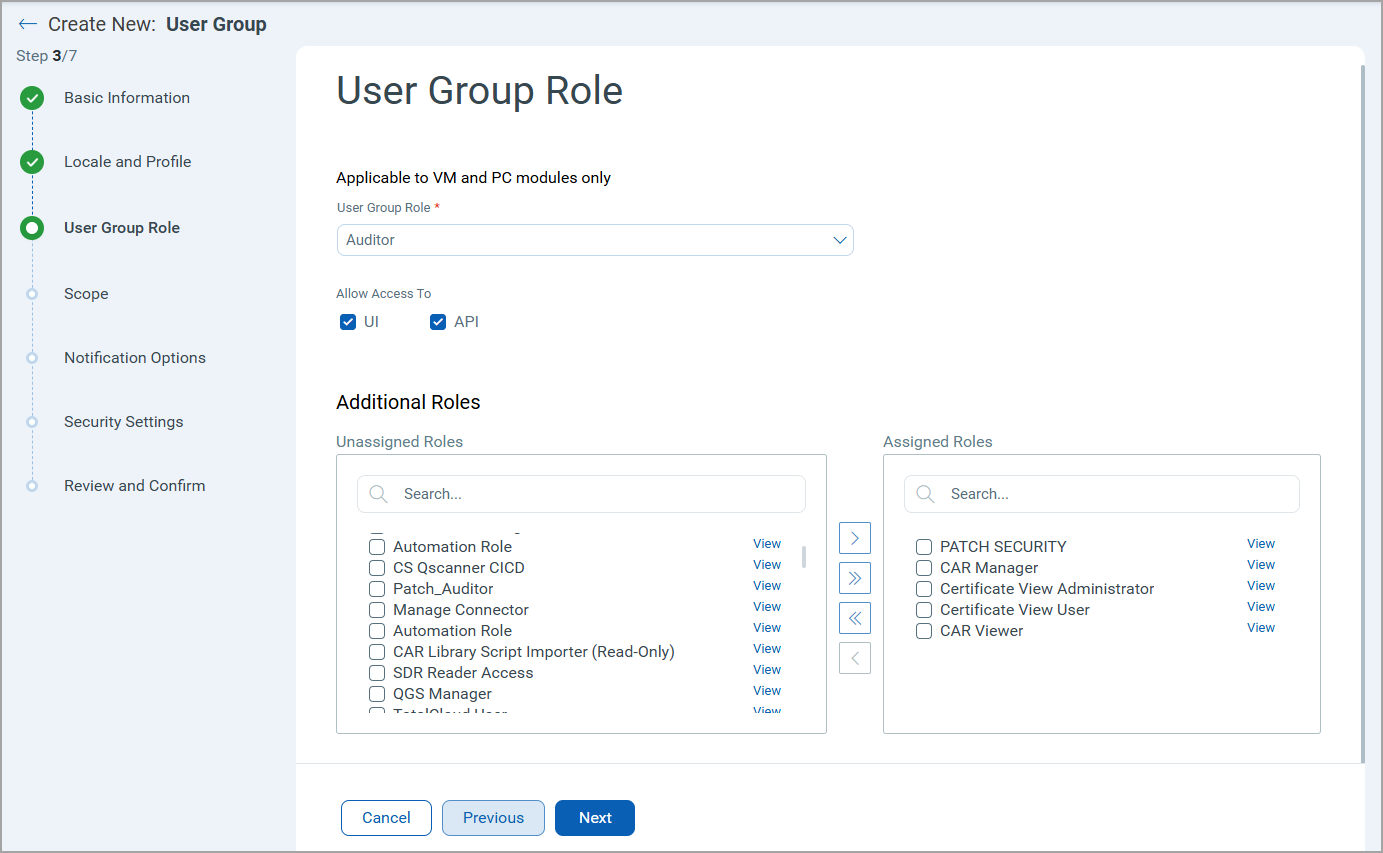
- To provide UI or API access, select the UI or API or both the checkboxes as required.
- To assign the roles to the members, select the required roles under the Additional Roles list and click > arrow to move them to the Assigned Roles list. You can click >> to move all roles at once.
- (Optional) You can also unassign the selected roles.
- Click Next.
Scope
Refer to the following details and select the appropriate options:
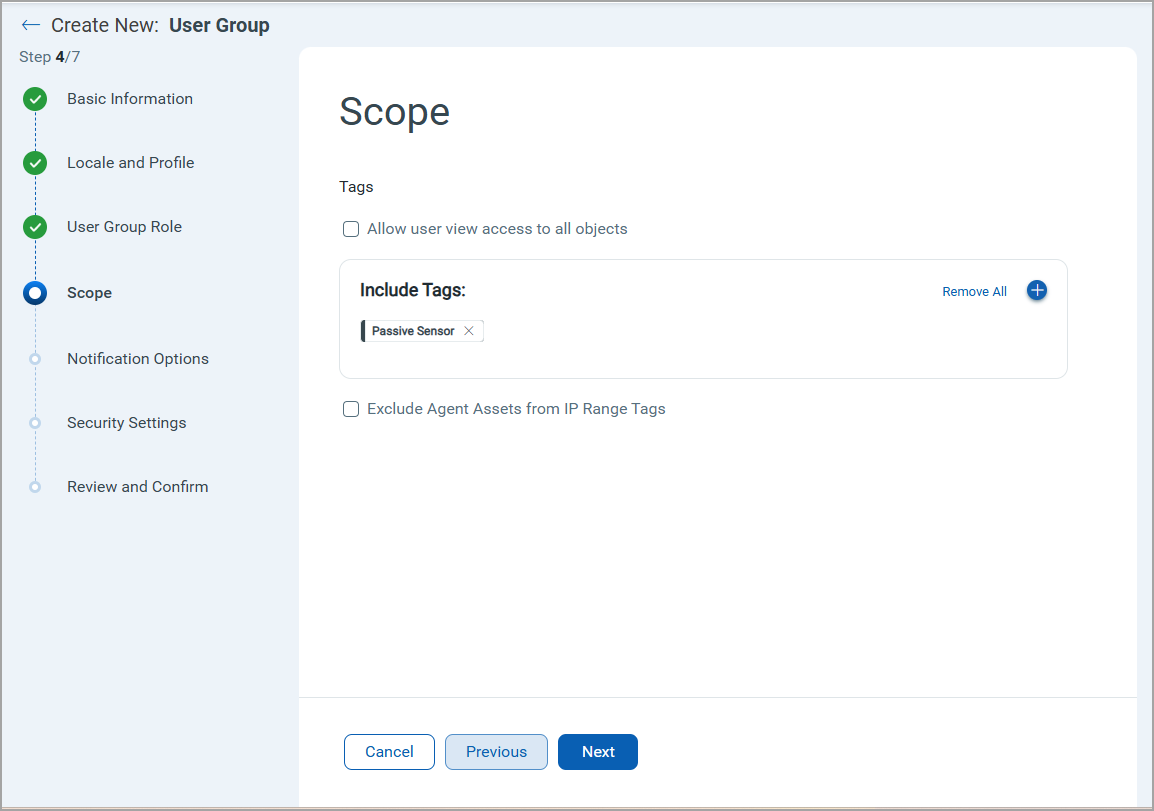
- To provide view access to all objects, select the Allow user view to all objects checkbox.
- To include tags:
- Click
 . A Select Scope Tags window is displayed.
 - On the All tags tab, select the tags to be added.
- (Optional) To create a new tag, click Create New Tag.
- Click Add Tag.
- Click
- To exclude agent assets from IP range tags, select the Exclude Agent Assets from IP Range Tags checkbox.
- Click Next.
Notification Options
Select the required options for notifications and frequency for latest controls and enable or disable scan complete notification.
Security Settings
The SAML SSO setting is enabled by default. Configure the user session timeout time. You can set this value between 10 - 240 minutes.
Review and Confirm
Review your selections, and click Submit.
The user group is displayed on the User Group listings page. The users from the respective Azure AD groups are included in the mapped Qualys group after the sync is successful.
- If the user is deleted in Azure AD, the user in Admin application is deactivated in the next sync cycle.
- If new user is added in the Azure AD group, it will be synced to the Qualys user group in the next sync cycle.
- If a user with a valid value is edited in Azure AD, the user will be updated in Qualys user group in the next sync.
- You can edit the AD synced user only after the user is detached from its associated user group. If you update or remove the API external ID value for the user, a duplicate user is created during the next connector sync.
Manage a User Group
You can view the user group details, edit the user group details, and delete the user group from the Quick Actions menu for the respective user group.
View User Group
When you click View Details from the Quick Actions menu, you are navigated to the Group Details Page. Here, you can view user group details such as Basic Information, Roles and Scope, Permissions, Security, and Options tabs.
Edit User Group
When you click Edit from the Quick Actions menu, you are navigated to the Edit User Group Page. Here, you can edit the user group details, such as changing the user group name, timezone, and so on.
Delete User Group
Complete the following steps to delete a user group:
- Select the user group and from the Quick Actions menu, click Delete. The Confirmation pop-up appears.
- Select the appropriate option for the action you want to happen on the users in the group after group deletion:
- Detach all users in this group
- Deactivate all users in this group
- Delete all users in this group - Click Delete Group.
After the group is deleted, if you had selected the option to deactivate the users while deleting the user group, the users will not be able to log in.
A User Group cannot be deleted if it is mapped to an IdP group in a connector.